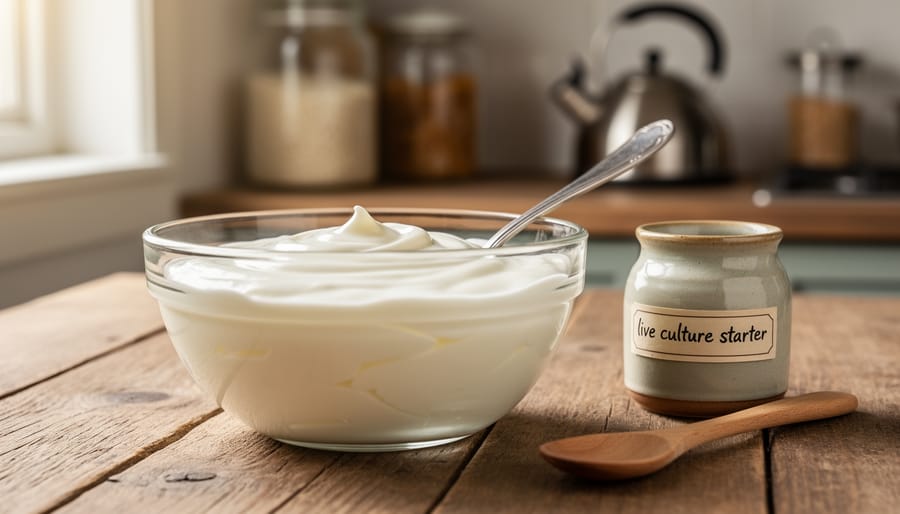
Making homemade yogurt requires just two ingredients: milk and a small amount of live-culture yogurt as starter. Heat your milk to 82-85°C to denature proteins for a thicker set, cool it to 45-50°C to protect the bacterial cultures, whisk in your starter, then hold the mixture at that warm temperature for 6 to 24 hours while Streptococcus thermophilus and Lactobacillus delbrueckii subsp. bulgaricus transform the lactose into tangy, creamy yogurt. The longer fermentation period produces a more acidic result with higher probiotic counts.
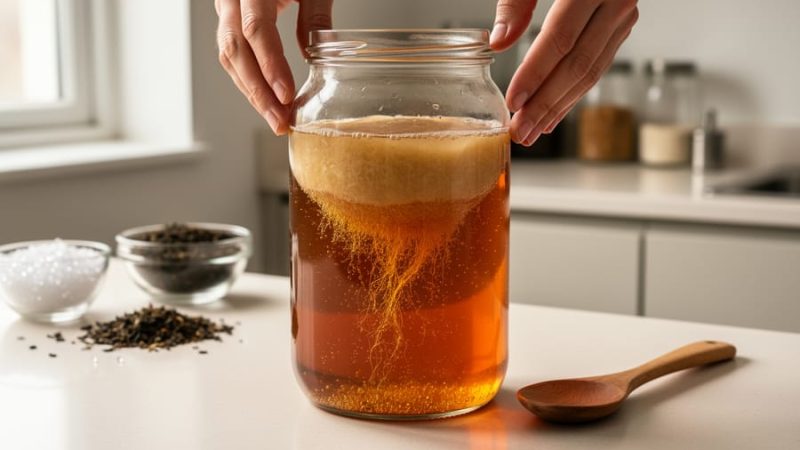
If you’ve explored fermented beverages like kombucha fermenté you already understand the fundamental alchemy at work: beneficial bacteria convert sugars into acids, creating both flavor and shelf stability. Yogurt follows the same principle but delivers a richer, more versatile result. You can eat it straight, blend it into smoothies, strain it into thick Greek-style labneh, or use the whey in cocktail syrups.
The process is remarkably forgiving once you grasp the temperature windows. Use quality milk, preferably organic and from local dairies, though both UHT and standard pasteurized milk work well. Raw milk enthusiasts must boil and cool their product first for safety. The bacterial cultures must reach at least 10 million per gram in the finished yogurt to qualify as authentic, a threshold easily achieved with proper incubation. What separates mediocre yogurt from exceptional is attention to temperature, patience during fermentation, and selecting a high-quality starter culture that you’ll propagate batch after batch.
Understanding Yogurt Fermentation: The Science Behind the Culture
Making yogurt at home isn’t magic. It’s a controlled bacterial fermentation that transforms plain milk into a tangy, probiotic-rich food using the same fundamental principles that drive kombucha brewing.
At its core, yogurt fermentation relies on two specific bacterial partners working in tandem: Streptococcus thermophilus and Lactobacillus delbrueckii subsp. bulgaricus. These aren’t just any bacteria. They form the precise starter culture required for authentic yogurt, and both must be present in your finished product at a minimum of 10 million bacteria per gram. That concentration isn’t arbitrary. It ensures you’re getting genuine probiotic benefits, not just sour milk.
Here’s how the process unfolds: when you add these live cultures to warm milk and hold them at 45-50°C, the bacteria consume lactose (milk sugar) and convert it into lactic acid. This acid does two crucial things. First, it drops the pH, creating that characteristic tang. Second, it denatures milk proteins, causing them to coagulate and form yogurt’s thick, custard-like texture. The longer you ferment (a minimum of 24 hours is standard), the more lactose converts to lactic acid, producing a tangier product with higher probiotic counts and lower residual sugar.
If you’ve brewed kombucha, this rhythm feels familiar. Just as a SCOBY (symbiotic culture of bacteria and yeast) transforms sweet tea into a fizzy, probiotic drink over days of fermentation, yogurt cultures transform milk through bacterial metabolism. Both processes demand temperature control, time, and living cultures. Both reward patience with complex flavors and beneficial bacteria. The main difference? Yogurt fermentation is purely bacterial and happens faster at a higher, more precise temperature range, while kombucha involves both bacteria and yeast working over a longer timeline at room temperature.
Understanding this science builds confidence. You’re not following a recipe blindly. You’re managing a living process, creating conditions where beneficial bacteria thrive and transform your ingredients into something greater than their parts.
Tools and Equipment You’ll Need
Making yogurt at home requires surprisingly little specialized equipment, but each tool plays a specific role in achieving safe, consistent results. Unlike the relatively forgiving world of kombucha brewing, yogurt fermentation demands precise temperature control at critical stages. The good news? Most of what you need is probably already in your kitchen.
- Accurate thermometerNon-negotiable for monitoring milk temperature during pasteurization (minimum 72°C) and cooling to fermentation range (45-50°C)
- Heavy-bottomed pot or dedicated yogurt makerFor heating milk evenly without scorching; yogurt makers maintain steady fermentation temperature automatically
- Insulated container or thermal coolerKeeps your fermenting yogurt at the crucial 45-50°C range for the full 24+ hour fermentation period
- Glass jars with lidsFor fermentation and storage; glass won’t leach flavors and cleans thoroughly between batches
- Long-handled spoon (non-reactive)Stainless steel or wood for stirring and mixing starter culture without introducing contaminants
The thermometer deserves special emphasis. Digital instant-read models offer the precision you need, though a traditional dairy thermometer works perfectly well. Some brewers who make both yogurt and kombucha use the same thermometer for monitoring their SCOBY hotel temperature, making it a worthwhile investment across fermentation projects.
If you’re just starting out, skip the yogurt maker and use what you have. A thermal cooler filled with warm water maintains temperature remarkably well, as does wrapping your jars in towels and placing them in an insulated box or even your oven with just the light on. Once you’re hooked on homemade yogurt, a dedicated machine simplifies the process, but it’s hardly essential for excellent results.
Choosing Your Ingredients
Selecting the Right Milk
Your milk choice shapes both flavor and fermentation success. While you don’t need exotic ingredients, understanding your options helps you make smarter decisions for your first batch and beyond.
UHT vs. Pasteurized Milk
UHT (ultra-high temperature) milk is the most convenient option. It’s shelf-stable, widely available, and already heat-treated to a point that eliminates pathogens. You can use it straight from the carton after cooling to fermentation temperature, which saves time and removes variables for beginners. The trade-off? UHT processing alters milk proteins slightly, sometimes resulting in a thinner yogurt texture.
Pasteurized milk offers a middle ground. It’s been heated to kill harmful bacteria (typically around 72°C for 15 seconds) but retains more of its original structure than UHT. Many experienced yogurt makers prefer it because it produces a creamier, more stable set. You’ll still need to heat it to at least 72°C before fermenting to ensure safety and improve texture, but the result often justifies the extra step.
Small-Animal and Specialty Milks
Quality milk from sheep or goats delivers richer flavor and higher fat content, which translates to thicker, creamier yogurt. Sheep’s milk, in particular, contains nearly double the solids of cow’s milk, creating an almost Greek-style texture without straining. These options shine if you’re after something more distinctive than standard supermarket yogurt.
Organic and local milk won’t necessarily ferment better, but they often taste cleaner and support sustainable practices. If those values matter to you, and they do to many kombucha brewers who prize ingredient quality, it’s worth seeking out a local dairy.
Finding Your Starter Culture
Your starter culture is the heart of your yogurt, it contains the live bacteria that will transform milk into tangy, probiotic-rich goodness. You have three reliable options, each with distinct advantages.
The easiest route for beginners is grabbing a container of plain yogurt from your grocery store. Look for labels stating “live active cultures” or listing Streptococcus thermophilus and *Lactobacillus delbrueckii subsp. bulgaricus*, these two bacteria are non-negotiable for authentic yogurt. Avoid flavored varieties or those with added thickeners, which can interfere with fermentation. A small pot of quality yogurt will start several batches, making this both convenient and economical.
Freeze-dried starter packets offer consistency and shelf stability. They’re particularly useful if you’re making yogurt infrequently or want precise bacterial strains. Follow package instructions for rehydration ratios, most call for one packet per liter of milk.
Once you’ve made your first batch, reserve two to three tablespoons as starter for the next round. This “backslopping” method works beautifully for several generations, though the culture may weaken after four to five cycles. When your yogurt starts setting more slowly or tastes less tangy, refresh with a new commercial starter.
Whatever route you choose, verify that minimum count of 10 million bacteria per gram by selecting fresh products with recent production dates.
Safety First: Critical Temperature and Pasteurization Guidelines
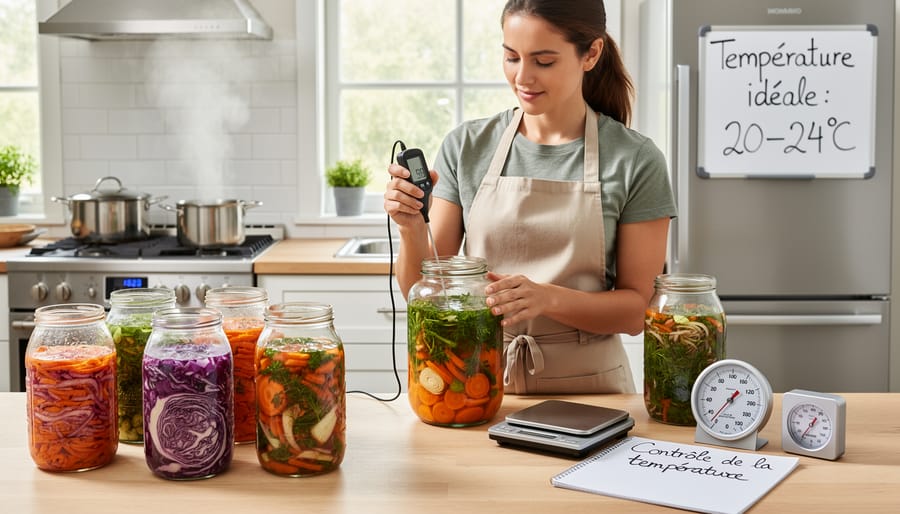
Temperature control isn’t just a detail when making yogurt, it’s the cornerstone of food safety. Whether you’re fermenting yogurt, brewing kombucha, or exploring any other probiotic creation, understanding pasteurization and safe handling prevents serious health risks while ensuring your ferments develop the beneficial bacteria you’re after.
If you’re using raw milk, this pasteurization step becomes absolutely critical. Boil the milk and cool it to fermentation temperature before adding your cultures. UHT or already-pasteurized milk gives you a head start, but heating it again improves texture by denaturing proteins that help the yogurt set. Either way, verify your thermometer’s accuracy before you start.
The danger zone sits between 4°C and 60°C, where pathogenic bacteria multiply rapidly. You need to move milk through this range quickly, both when heating and cooling. Once your milk reaches pasteurization temperature, hold it there for at least 15 seconds. Don’t estimate or eyeball it. Use a reliable thermometer and watch the clock.
After pasteurization, cool the milk to 45-50°C before adding your starter cultures. Too hot kills the beneficial bacteria you’re trying to cultivate. Too cool and they won’t activate properly, leaving you with spoiled milk instead of yogurt. This precision matters just as much in kombucha brewing, where temperature swings can ruin a batch or encourage mold growth.
These steps aren’t suggestions or shortcuts for experienced fermenters. They’re non-negotiable safeguards that protect you and anyone who eats what you make. Skipping pasteurization or guessing temperatures invites contamination from salmonella, E. coli, and other pathogens that thrive in improperly handled dairy. Master these basics with yogurt, and you’ll carry that discipline into every fermentation project ahead.
Step-by-Step: How to Make Homemade Yogurt
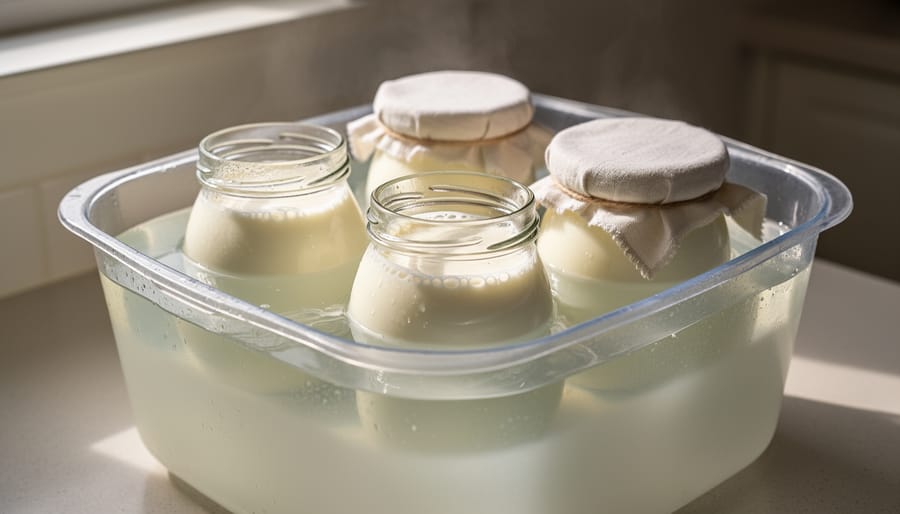
Step 1: Heat and Pasteurize Your Milk
Pour des raisons de sécurité alimentaire et de texture idéale, commencez par chauffer votre lait dans une casserole à fond épais sur feu moyen. Vous devez atteindre au minimum 72°C et maintenir cette température pendant 15 secondes, un processus de pasteurisation qui élimine les bactéries indésirables pouvant concurrencer vos cultures bénéfiques.
Si vous utilisez du lait cru, portez-le à ébullition complète avant de poursuivre. Cette étape n’est pas négociable avec le lait non pasteurisé. Le lait UHT ou déjà pasteurisé peut techniquement être utilisé sans chauffage supplémentaire, mais chauffer même ce lait améliore considérablement la texture finale en modifiant la structure des protéines, créant un yaourt plus ferme et crémeux.
Utilisez un thermomètre de cuisine fiable, pas d’approximations. Remuez régulièrement pour éviter la formation d’une peau en surface et empêcher le lait de brûler au fond. Cette étape crée les conditions parfaites pour que vos cultures lactiques prospèrent sans compétition, exactement comme préparer un environnement propre pour votre SCOBY de kombucha.
Step 2: Cool to Fermentation Temperature
Once your milk has been pasteurized and is safely heated, you need to cool it down to 45-50°C before adding your starter culture. This temperature range is absolutely critical, go higher and you’ll kill the beneficial bacteria before they can do their work. Drop below 40°C and fermentation will be sluggish or inconsistent.
The fastest method is an ice bath: place your pot in a larger container filled with cold water and ice, stirring the milk occasionally. This typically takes 15-20 minutes. Alternatively, you can simply let the pot sit at room temperature, but this requires patience and vigilant thermometer checks.
Use a reliable kitchen thermometer to verify the exact temperature. Once you hit 45-50°C, you’re ready to add your starter immediately. Think of this step like brewing kombucha, precision with temperature at the beginning sets up everything that follows. Rush this cooling phase or guess at the temperature, and you risk wasting your milk and starter culture on a batch that never properly ferments.
Step 3: Add Your Starter Culture
Once your milk reaches 45-50°C, you’ll add roughly one tablespoon of starter per liter of milk, about a 1:20 ratio works well for most home batches. If you’re using a previous batch as starter, the same proportion applies. Scoop a few tablespoons of the warm milk into a clean bowl, whisk in your starter culture until smooth, then pour this mixture back into the pot. Stir gently but thoroughly for 30-45 seconds to distribute the bacteria evenly throughout the milk; uneven mixing creates inconsistent texture and fermentation. Think of this step like pitching yeast in beer brewing or introducing a SCOBY to sweet tea, you’re inoculating the entire volume with live cultures that will transform it. Work quickly once the temperature is right; lingering too long allows the milk to cool below the activation range, slowing your fermentation and potentially weakening the culture’s effectiveness.
Step 4: Ferment for 24+ Hours
Once you’ve added your starter culture and mixed it thoroughly, transfer the inoculated milk to clean glass jars or leave it in your pot. Now comes the critical 24-hour wait.
You need to maintain that 45-50°C temperature range throughout fermentation. Wrap your jars in towels and place them in an insulated cooler, or use a yogurt maker that holds steady heat. Some people tuck jars into a turned-off oven with just the light on, or nestle them in a heating pad set to low. Check the setup after an hour, if it’s dropped below 40°C or climbed above 55°C, adjust your insulation or heat source.
The minimum fermentation window is 24 hours. During this time, the bacteria are converting lactose into lactic acid, thickening the milk and developing that characteristic tang. You’ll notice the liquid starting to set after about 6-8 hours, but resist the urge to move or jostle the jars, let the culture work undisturbed.
Longer fermentation creates a sharper, more sour yogurt with lower lactose content and higher probiotic density. If you prefer milder yogurt, stop at 24 hours. For maximum tanginess and gut-friendly bacteria, push to 36 or even 48 hours. The texture firms up over time, though you may see some whey separation at the longer end, that’s normal and harmless.
Trust the process. The bacteria are doing exactly what kombucha’s SCOBY does: transforming simple ingredients into something alive and probiotic-rich.
Step 5: Refrigerate and Store
Once your yogurt has fermented for at least 24 hours and achieved that custard-like consistency, it’s time to halt the process. The cold temperature of your refrigerator stops bacterial activity almost entirely, preserving the yogurt at its current tanginess and probiotic potency.
Transfer your jars directly to the fridge without disturbing them too much, shaking can break the delicate set. The yogurt will continue to firm up slightly as it chills over the next few hours.
Before you dig in, reserve about 100 grams (roughly half a cup) as starter for your next batch. Store this portion in a clean glass jar at the back of your fridge, where temperatures stay most consistent. Fresh homemade yogurt keeps well for seven to ten days when properly refrigerated, though its tanginess will intensify gradually. The reserved starter remains viable for about a week, so plan your next batch accordingly.
If you notice any separation, a thin layer of yellowish whey pooling on top, simply stir it back in or drain it off for a thicker, Greek-style texture. This is completely normal and doesn’t indicate spoilage.
How to Tell When Your Yogurt Is Ready
After 24 hours of fermentation, your yogurt should exhibit several clear signs that the bacterial cultures have done their job. Gently tilt the jar without shaking it. Properly fermented yogurt will hold together as a single custard-like mass, perhaps with a thin layer of translucent whey pooling on top. It shouldn’t slosh like liquid milk. The surface might look slightly glossy or have a subtle skin.
Trust your senses to confirm successful fermentation:
- Texture: Set and jiggly, similar to panna cotta, not runny or liquid
- Smell: Pleasantly tangy and clean, reminiscent of fresh dairy with a slight sourness
- Appearance: Opaque white or cream-colored, possibly with clear whey separation at the top
- Consistency: Spoon leaves a clean trail when dragged across the surface
A small taste test reveals the final verdict. Your yogurt should taste tangy but balanced, not aggressively sour or bitter. Some slight variation in sourness is normal based on fermentation time and temperature.
If your yogurt remains too thin after 24 hours, it likely didn’t hold a stable temperature around 45-50°C during fermentation. Next time, improve your insulation method or consider a yogurt maker. Excessively sour yogurt fermented too long or too warm; reduce the time slightly on your next batch. Separated whey is completely normal and can be stirred back in or drained off for Greek-style thickness. However, any pink, orange, or fuzzy growth, or a smell resembling nail polish or vomit, indicates contamination. Discard that batch immediately and sanitize your equipment before trying again.
Beyond Basic Yogurt: Flavoring and Next Steps
Once your yogurt is set, the real fun begins. Add flavorings after fermentation, never before, sugar, fruit, and honey can interfere with bacterial activity and throw off your careful temperature work. Stir in honey, vanilla extract, or fruit compote just before serving, keeping the base batch pure for consistent results.
For Greek-style yogurt, line a fine-mesh strainer with cheesecloth, set it over a bowl, and refrigerate your finished yogurt for 4-6 hours. The whey drains away, leaving thick, creamy yogurt with concentrated protein and tanginess. Save that whey, it’s packed with probiotics and works beautifully in recettes de smoothies or lacto-fermented vegetables.
Blend your yogurt into probiotic-rich drinks. Mix it with frozen fruit and a splash of eau pétillante for a light lassi, or explore kefir smoothies that share yogurt’s tangy fermented character. The skills you’ve built, temperature control, culture management, patience through fermentation, translate directly to kombucha brewing, water kefir, and even DIY carbonation projects.
Mastering yogurt fermentation opens doors. You’ve learned to nurture live cultures, maintain ideal conditions, and recognize when fermentation is complete. Apply these principles to your first SCOBY, and you’ll approach kombucha with confidence rather than guesswork.
Common Questions About Homemade Yogurt
Can I use non-dairy milk to make yogurt?
While traditional yogurt requires dairy milk, you can experiment with non-dairy alternatives like soy or coconut milk, though results vary significantly. Non-dairy versions often need additional thickeners and specialized starter cultures designed for plant-based milk, and they won’t achieve the same texture or probiotic profile as dairy yogurt made with Streptococcus thermophilus and Lactobacillus delbrueckii subsp. bulgaricus.
How long does homemade yogurt last in the refrigerator?
Properly stored homemade yogurt keeps for seven to ten days in a clean, sealed container in the fridge. The longer it sits, the more pronounced the tangy flavor becomes as the bacteria continue working slowly even in cold storage.
Can I reduce the fermentation time to less than 24 hours?
You can stop fermentation earlier and get a milder, sweeter yogurt, but the minimum 24-hour period ensures you develop the full probiotic content and characteristic tang. Shorter fermentation means less bacterial activity, which translates to fewer live cultures in your final product and a thinner consistency.
Why didn’t my yogurt set properly?
The most common culprits are incorrect fermentation temperature (it needs to stay between 45-50°C to activate the cultures), dead or weak starter, or insufficient fermentation time. If your mixture is too hot when you add the starter, you’ll kill the bacteria; too cool, and they won’t multiply effectively.
Beyond these basics, many first-time yogurt makers worry about reusing starter culture batch after batch. You can absolutely save a few tablespoons from each batch to inoculate the next one, but the culture will eventually weaken over time, typically after five to seven generations. If you notice your yogurt taking longer to set or developing off flavors, it’s time to refresh with new commercial starter or a fresh store-bought yogurt with live cultures.
The comparison to kombucha brewing is apt: both processes rely on maintaining specific temperature ranges and creating the right environment for beneficial bacteria to thrive. Where kombucha uses a SCOBY and sweetened tea, yogurt uses bacterial cultures and heated milk, but the fundamental principles of fermentation, patience, and temperature control remain the same. If you’re comfortable managing a kombucha brew, you already have the mindset and discipline needed for successful yogurt making. The key difference is timeline: kombucha typically ferments for seven to fourteen days at room temperature, while yogurt completes its transformation in 24 hours at a warmer, controlled temperature.
Making yogurt at home is simpler than most people expect, and far more rewarding. With just two ingredients, a thermometer, and patience, you’ve created a living food packed with beneficial bacteria. The skills you’ve developed here, monitoring temperature, understanding fermentation timing, recognizing when cultures are thriving, translate directly to brewing kombucha and exploring other probiotic beverages. You’ve learned to respect the 45-50°C sweet spot, maintain stable conditions for 24 hours, and trust the process even when nothing visible seems to be happening.
This is where beverage fermentation gets exciting. The confidence you gain from transforming plain milk into tangy yogurt opens doors to kimchi brine sodas, water kefir, and naturally fermented fruit drinks. Each fermentation project teaches you to read subtle signs, adjust variables, and develop an intuition for when cultures are working in your favor.
Don’t overthink your first batch. Grab quality milk, a spoonful of live-culture yogurt, and commit to the process. The worst outcome is a learning experience; the best is discovering you’ve been capable of this all along. Your fermentation adventure starts now.