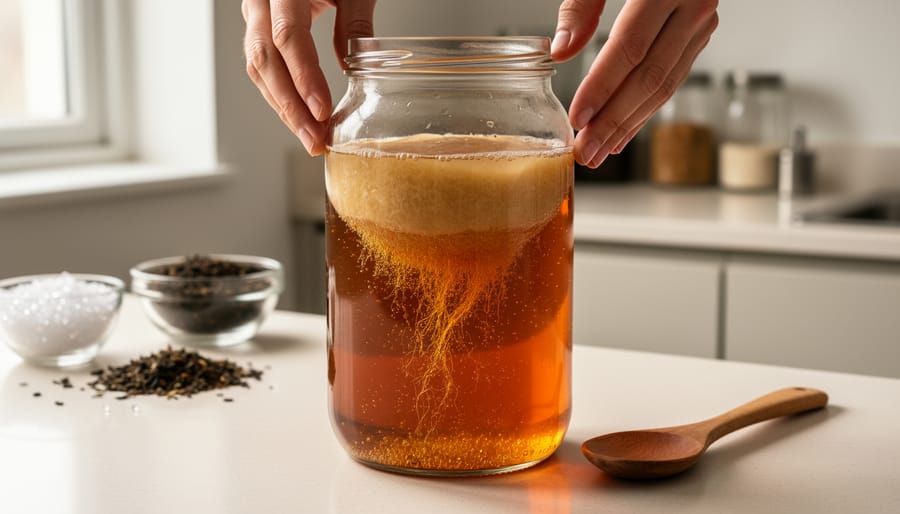
Making kombucha at home requires just five ingredients, a glass jar, and about 10 days of patience. You’ll steep 5 grams of tea in a liter of boiling water, stir in 50 grams of sugar until dissolved, cool the mixture to room temperature, then add a SCOBY (symbiotic culture of bacteria and yeast) and let it ferment for 7 to 10 days at 60°F to 85°F. The result is a tangy, effervescent probiotic beverage you can customize with endless flavor combinations, and once you understand how kombucha fermentation works you’ll have a continuous supply on tap for pennies per bottle.
The beauty of brewing kombucha lies in its simplicity. Unlike complex cocktail techniques or precise coffee extraction methods, kombucha fermentation is remarkably forgiving. The SCOBY does most of the work, transforming sweet tea into a complex, slightly acidic drink that rivals anything you’ll find at premium grocery stores. You’ll need to monitor a few critical safety markers (particularly pH levels and proper sanitation), but the process itself is straightforward enough for complete beginners.
What makes home brewing particularly appealing in 2026 is the creative control it offers. Once you’ve mastered the basic first fermentation, you can experiment with second fermentation flavoring, adjusting everything from carbonation levels to sweetness profiles. Whether you’re a bartender looking to craft house-made mixers or simply someone curious about the growing world of functional beverages, kombucha brewing opens the door to a hands-on exploration of fermentation science that’s both practical and rewarding.
What You’ll Need to Brew Your First Batch
Gathering everything before you begin will turn your first kombucha batch from overwhelming to straightforward. You’ll need a handful of basic items, most of which you probably already have in your kitchen, plus one living ingredient that transforms sweet tea into a probiotic-rich beverage.
The Essential Starter Kit
Your foundation rests on five core components. First, the SCOBY (symbiotic culture of bacteria and yeast), which looks like a slippery disc of beige or cream-colored cellulose. Think of it as your fermentation engine. You can purchase a SCOBY from online retailers, homebrew supply shops, or local kombucha brewers who often have extras to share. Make sure it comes with at least half a cup of starter liquid, previously fermented kombucha that kickstarts your batch.
For tea, stick with plain black, green, or a blend of the two. Avoid flavored teas, Earl Grey (the bergamot oil can inhibit fermentation), or anything with added oils. You’ll use 5 grams of tea leaves per liter of water. Sucrose, regular white granulated sugar, is non-negotiable; the SCOBY feeds on it during fermentation, so don’t substitute honey, agave, or artificial sweeteners. Plan for 50 grams per liter.
Your fermentation vessel must be glass, a half-gallon or gallon-size jar works perfectly. Metal can react with the acidic kombucha, and plastic harbors bacteria in scratches. You’ll also need a breathable cover like a clean cotton cloth or coffee filter secured with a rubber band, since fermentation requires oxygen.
- Essential ingredients: SCOBY with starter liquid, plain tea leaves (5g per liter), white granulated sugar (50g per liter)
- Fermentation equipment: Glass jar (half-gallon to gallon), breathable cloth cover, rubber band
- Safety and testing: pH testing strips (to verify 4.6 or lower), kitchen thermometer
- For second fermentation (optional): Glass bottles with tight seals, funnel, strainer, flavorings like fresh fruit or ginger
pH testing strips aren’t glamorous, but they’re critical for confirming your brew reaches a safe acidity level of 4.6 or below after adding the SCOBY. A kitchen thermometer helps you verify your sweet tea has cooled to room temperature before introducing the culture, hot liquid will kill it.
If you plan to carbonate and flavor your kombucha, grab swing-top glass bottles or recycled kombucha bottles with secure caps for the second fermentation phase. A funnel and fine-mesh strainer make bottling cleaner, and you can experiment with fresh fruit, herbs, or spices once you’ve nailed the basics. Start simple with first fermentation supplies, then expand your toolkit as you gain confidence.
Safety First: pH Levels and Fermentation Conditions
Before you add the SCOBY to your sweet tea, understand that kombucha brewing isn’t difficult, but it does require attention to a few critical safety markers. Getting these fundamentals right protects you from harmful bacteria and ensures your fermentation succeeds.
The most important safety checkpoint is pH. Once you’ve introduced your SCOBY and starter liquid to the cooled tea, the mixture should reach pH 4.6 or lower within the first 24 hours. This acidic environment prevents pathogenic bacteria from taking hold while allowing beneficial yeasts and bacteria to thrive. Test with pH strips if you’re brewing your first few batches or using a new SCOBY, especially if you didn’t receive much starter liquid. Too-high pH creates an opening for mold and unwanted microbes.
Sanitation matters just as much as acidity. Wash your fermentation jar, utensils, and hands with hot soapy water before each brew. Avoid antibacterial soaps near your SCOBY, plain dish soap and thorough rinsing work perfectly. Your brewing vessel should be glass or food-grade ceramic, never metal, which can react with the acids in kombucha.
Kombucha requires fermentation in an aerobic environment, meaning the SCOBY needs oxygen to function. Cover your jar with a breathable cloth or coffee filter secured with a rubber band, not an airtight lid. This setup keeps out dust and insects while allowing airflow, similar to how you’d approach DIY carbonation projects that rely on controlled gas exchange.
Temperature control plays a dual role in both safety and fermentation speed. The ideal range sits between 60°F and 85°F (16°C and 29°C), with the sweet spot at 20°C to 30°C. Cooler temperatures slow fermentation but remain safe; warmer conditions accelerate the process but risk producing overly vinegary kombucha if you don’t monitor closely. Keep your jar away from direct sunlight and temperature swings.
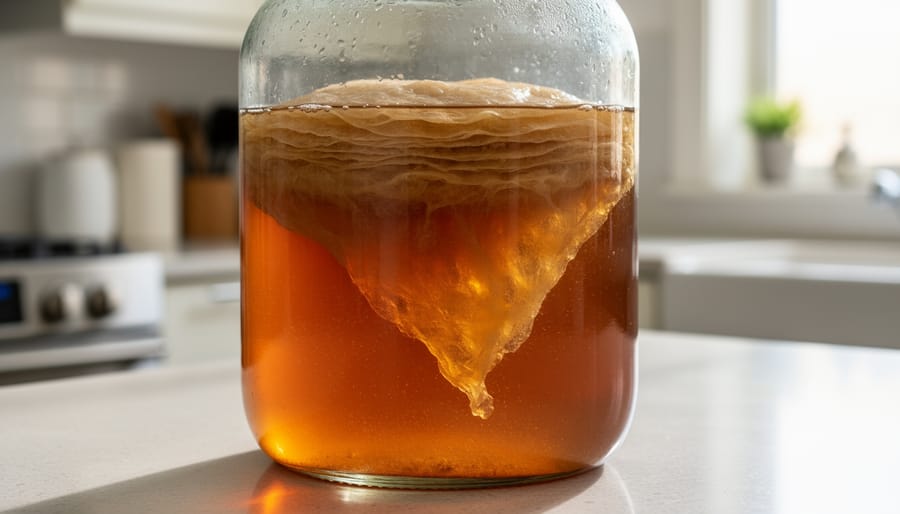
Watch for contamination signs throughout the 7 to 10 days. A healthy SCOBY develops a new cream-colored layer on the tea’s surface, and the liquid smells pleasantly tangy. Red flags include fuzzy growth, an off-putting rotting odor, or visible insect activity. If anything looks or smells wrong, trust your instincts and discard it.
The Kombucha Brewing Process: From Sweet Tea to Fermented Beverage
Step 1: Brewing and Sweetening Your Tea Base
Start by bringing one liter of water to a rolling boil. Once it’s bubbling vigorously, remove it from the heat and add 5 grams of tea leaves, that’s roughly one heaping teaspoon if you’re measuring by eye. Black tea is the traditional choice because it produces a robust, slightly tangy kombucha that ferments predictably, but you can also use green tea for a lighter, more delicate flavor. Many home brewers blend the two, mixing three parts black to one part green for complexity. Avoid heavily flavored teas like Earl Grey or anything with oils, as these can interfere with the SCOBY’s health over time.
Let the tea steep for about five minutes, then remove the leaves or strain them out. While the liquid is still hot, stir in 50 grams of white granulated sugar, roughly a quarter cup, until it dissolves completely. Don’t skip the sugar or cut it down in an attempt to make a “healthier” brew. The SCOBY doesn’t feed on tea; it feeds on sucrose. During fermentation, the bacteria and yeast will consume most of that sugar, converting it into organic acids, carbon dioxide, and trace amounts of alcohol. What starts as a sweet tea base will become a tart, fizzy beverage with significantly less sugar than you put in. If you withhold sugar now, you’ll starve the culture and end up with weak, under-fermented kombucha that tastes more like stale tea than the tangy drink you’re aiming for.
Step 2: Cooling to Room Temperature
After dissolving the sugar in your freshly brewed tea, patience becomes your most important ingredient. Adding a SCOBY to liquid that’s even moderately warm will damage or kill the living culture, the heat destroys the beneficial bacteria and yeast you need for fermentation. You must wait until the sweet tea reaches room temperature, typically between 68°F and 75°F (20°C to 24°C), before introducing your SCOBY.
If you’re eager to start fermentation without waiting several hours, there’s a simple workaround: brew a concentrated tea base using only half your total water. Steep your 5g of tea leaves in 500ml of boiling water, dissolve the sugar completely, then top up with 500ml of cold or room-temperature water. This method cuts cooling time significantly while maintaining the proper tea-to-sugar ratio.
To verify your tea has cooled sufficiently, touch the outside of your glass vessel, it should feel neutral to cool against your skin, not warm. If you want precision, use a kitchen thermometer to confirm the temperature sits comfortably within the 20°C to 30°C range that supports healthy fermentation. Never guess or rush this step; your SCOBY’s survival depends on it.
Step 3: Adding the SCOBY and Starter Liquid
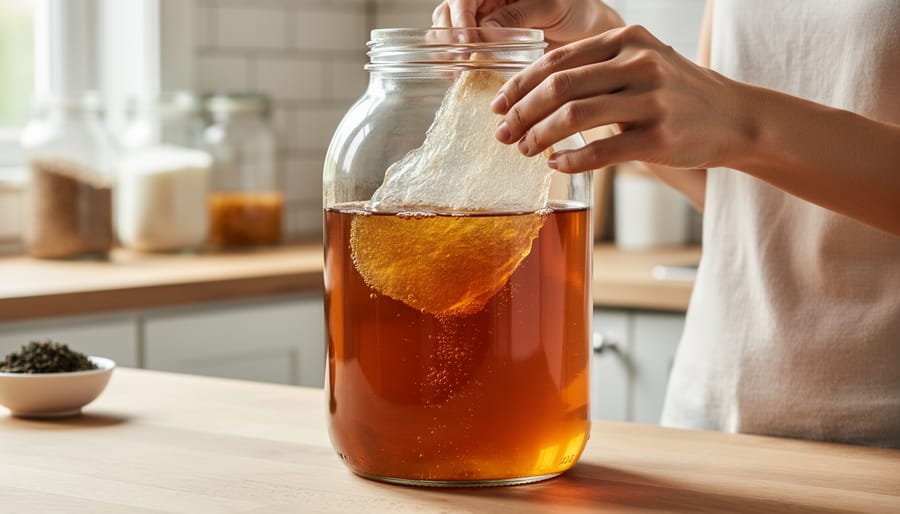
Once your sweet tea has cooled completely to room temperature, you’re ready for the most crucial step: introducing the SCOBY and starter liquid. Gently lift the SCOBY from its storage container, don’t worry if it feels slippery or looks a bit strange. This rubbery, pancake-like disc is the living culture that will transform your sweet tea into kombucha.
Place the SCOBY directly into your fermentation vessel, letting it settle wherever it wants. It might float on the surface, sink to the bottom, or hover somewhere in between, all are normal behaviors. Next, pour in at least one cup of unflavored, previously fermented kombucha (your starter liquid). This acidic liquid immediately begins lowering the pH toward the safe threshold of 4.6 or below, creating an environment hostile to harmful bacteria while giving beneficial microbes a head start.
If you acquired your SCOBY from a friend or brewing kit, they should have included this starter liquid with it. Never skip this step or substitute vinegar, the starter provides both acidity and the specific bacterial strains that define kombucha’s flavor profile. You’ll notice the liquid looks cloudy, which is perfectly normal and indicates active cultures ready to begin fermentation.
Step 4: First Fermentation, The Waiting Game
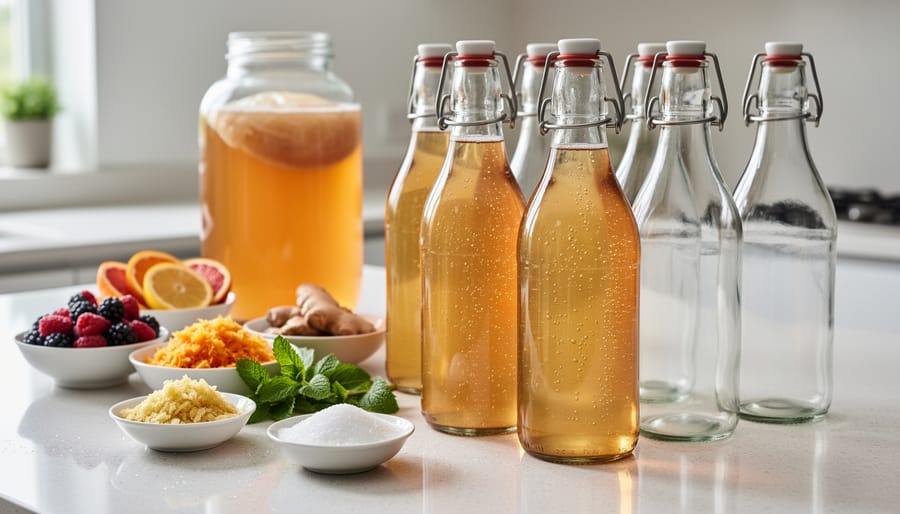
Once you’ve added your SCOBY and starter liquid, you’re entering the heart of kombucha making: the first fermentation takes 7 to 10 days, though the exact timing hinges on your environment. This is when the symbiotic culture converts sweet tea into tangy, effervescent kombucha through a fascinating biochemical process, but patience is your main task here.
Temperature is the primary variable controlling fermentation speed. The ideal range runs between 60°F and 85°F (16°C to 29°C), with performance optimal around 20°C to 30°C. Warmer conditions accelerate the yeast and bacteria activity, shortening your wait to around seven days, while cooler rooms can push fermentation closer to ten days or beyond. If your kitchen hovers around 68°F (20°C), expect a middle-ground timeline; at 78°F (26°C), things move noticeably faster.
Aerobic conditions, access to oxygen, are critical during this phase. Cover your fermentation vessel with a breathable cloth (cotton, coffee filter, or cheesecloth) secured with a rubber band, never an airtight lid. The bacteria in your SCOBY require oxygen to function properly, and sealing the jar will stifle fermentation and produce off-flavors. The cloth also keeps dust, fruit flies, and other contaminants out while allowing air exchange.
- Place your covered fermentation jar in a stable spot away from direct sunlight, ideally where room temperature stays consistent.
- Check the vessel daily without disturbing it, look for a new SCOBY layer forming on the surface, which signals active fermentation.
- After day five, start tasting with a clean spoon or straw inserted beneath the developing SCOBY to track the flavor shift from sweet to tart.
- Continue tasting every day or two until you find the balance you prefer, remembering that warmer rooms will reach this point sooner.
During fermentation, the yeast consumes sugar and produces alcohol and carbon dioxide, while the bacteria convert alcohol into acetic and other organic acids. This dual action is why kombucha develops its characteristic tang and why the liquid gradually shifts from tea-like sweetness to vinegary sharpness. The longer you wait, the more acidic it becomes, stop when it hits your sweet spot, usually when there’s still a hint of sweetness balanced by pleasant acidity.
Step 5: Second Fermentation for Flavor and Fizz (Optional)
After first fermentation finishes, you can bottle your kombucha as-is or move into second fermentation for carbonation and custom flavors. Transfer the finished kombucha into clean glass bottles with airtight seals, leaving about an inch of headspace. This is where you add flavor: fresh fruit pieces, fruit juice, ginger slices, herbs like mint or basil, or spices such as cinnamon work beautifully. A tablespoon of fruit or juice per 16-ounce bottle provides enough sugar to feed the remaining yeast and create fizz.
Seal the bottles tightly and store them at room temperature for 2 to 4 days. This anaerobic environment traps carbon dioxide produced by continued fermentation, building carbonation. The warmer your space, the faster carbonation develops. Check bottles daily by carefully opening one to test fizz levels, this releases pressure and prevents over-carbonation. Once you achieve your desired effervescence, refrigerate all bottles to halt fermentation. Second fermentation transforms plain kombucha into a personalized sparkling beverage tailored to your taste preferences.
How to Know When Your Kombucha Is Ready
The sweet-to-tart balance on your tongue is your primary indicator of readiness. After the recommended 7 to 10 days at room temperature (20°C to 30°C), taste a small sample with a clean spoon. Your kombucha should have transformed from syrupy sweetness into a pleasantly tangy beverage with just a hint of residual sugar. If it still tastes like sweet tea, the fermentation needs more time. If it makes your mouth pucker like vinegar, you’ve likely gone past the ideal window.
Visual cues offer supporting evidence. A new, thin SCOBY layer forming across the surface signals active fermentation, though its thickness varies with time and temperature. Some batches develop a robust quarter-inch disc, while others create a delicate film. Both are normal. The liquid beneath should look slightly cloudy with wispy strands, which are healthy yeast colonies doing their job.
pH testing provides scientific confirmation. Use testing strips to verify your kombucha has reached 4.6 or lower, the safe zone that prevents harmful bacteria growth while preserving beneficial cultures. This measurement matters especially for first-time brewers who haven’t yet calibrated their taste preferences.
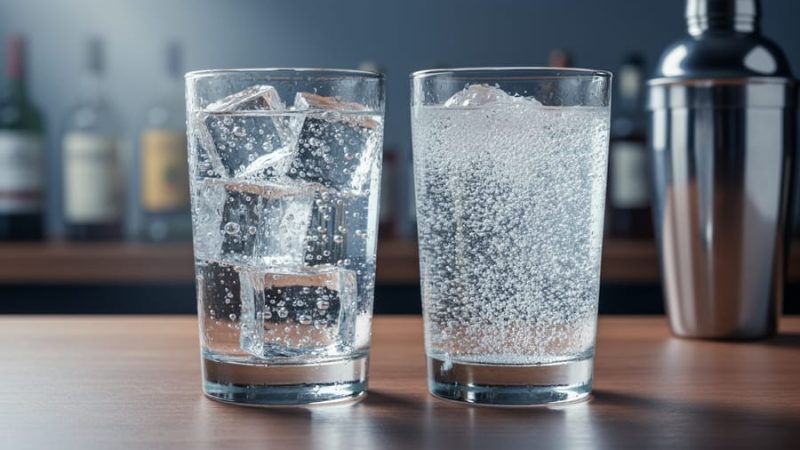
Temperature dramatically affects timing. A batch fermenting at 85°F (29°C) might finish in five days, while one at 60°F (16°C) could need two weeks. Track your room’s temperature to predict readiness more accurately in future batches. The spectrum runs from barely fermented sweet tea through balanced kombucha to mouth-puckering vinegar, and your personal sweet spot likely sits somewhere in the middle third of that range. Some brewers prefer their kombucha with noticeable fizz similar to club soda vs sparkling water, which develops more during optional second fermentation.
Troubleshooting Common First-Batch Issues
Your first batch might not go perfectly, and that’s completely normal. Most issues have straightforward fixes once you understand what’s happening in your fermentation vessel.
SCOBY position confuses many beginners, but there’s no wrong way for it to settle. A SCOBY can float on top, sink to the bottom, or even hover sideways in the liquid, all are fine. What matters is that a new layer forms on the surface during fermentation, which shows the culture is active and healthy.
Mold is the only truly serious problem you’ll encounter, and it’s rare if you’ve followed proper sanitation. Mold appears as fuzzy circles (usually white, green, or black) on the SCOBY surface and looks distinctly different from the smooth, creamy new SCOBY layer. Brown yeast strands hanging from the culture or settling at the bottom are normal and harmless. If you spot actual mold, discard everything, the liquid, the SCOBY, and the starter, then sanitize your vessel thoroughly and begin again with fresh materials.
Temperature swings directly affect fermentation speed and flavor development. If your kombucha tastes overly vinegary after just five days, your room is probably warmer than the ideal 20°C to 30°C range, speeding up the process. Move the vessel to a cooler spot or reduce fermentation time for the next batch. Too-sweet kombucha after ten days suggests a cooler environment; relocate to a warmer area or extend fermentation by a few days until you achieve the tart-sweet balance you prefer.
- SCOBY position (floating, sinking, sideways): all normal, watch for new layer formation instead
- Fuzzy mold spots: discard entire batch and sanitize; brown yeast strands: harmless, strain if desired
- Vinegary taste too early: move to cooler location or reduce fermentation time
- Still sweet after 10 days: relocate to warmer spot or extend fermentation period
- SCOBY between batches: store in glass jar with enough kombucha to cover, room temperature
Between batches, store your SCOBY in a glass jar covered with at least a cup of finished kombucha at room temperature. This “SCOBY hotel” keeps the culture alive indefinitely without feeding. Understanding these fermentation basics helps you recognize when something’s genuinely wrong versus just unfamiliar but harmless.
Frequently Asked Questions About Home Kombucha Brewing
Can I use different types of tea for brewing kombucha?
Yes, you can use black, green, white, or oolong tea, or even blends of these varieties. The 5 grams of tea leaves per liter can be any combination, though avoid flavored teas with oils (like Earl Grey) as they can harm the SCOBY.
How do I store extra SCOBYs between batches?
Keep spare SCOBYs in a glass jar with at least 1 cup of finished kombucha at room temperature, covered with a breathable cloth. This “SCOBY hotel” can store cultures for several months, just refresh the liquid every 4-6 weeks by pouring out half and adding fresh kombucha.
Is it safe to drink homemade kombucha daily?
Most people can safely enjoy 4-8 ounces of kombucha daily, though it’s wise to start with smaller amounts if you’re new to fermented beverages. Listen to your body and reduce consumption if you experience digestive discomfort.
What happens if I go on vacation during fermentation?
Your kombucha will continue fermenting and become increasingly tart and vinegary. If you’re away during the 7-10 day window, it’ll still be usable but stronger, you can dilute it with fresh sweet tea or use the extra-tart batch as starter liquid for your next brew.
How long does homemade kombucha last after bottling?
Properly bottled kombucha stored in the refrigerator stays fresh for 1-3 months. Cold temperatures slow fermentation dramatically, preserving flavor and carbonation, though the taste will gradually become more vinegary over time.
Why is my SCOBY floating or sinking in the jar?
Both positions are completely normal, SCOBYs float, sink, or hover mid-jar depending on their density and the fermentation stage. What matters is that a new culture layer forms on the surface during the 7-10 day fermentation period at 20°C to 30°C.
Beyond these common questions, beginners often wonder about troubleshooting specific scenarios. If your fermentation vessel stays cooler than the ideal 60°F to 85°F range, the process will simply take longer than the typical week, sometimes up to two weeks. Conversely, warmer conditions speed things up, occasionally finishing in five or six days.
The SCOBY itself is remarkably resilient. You’ll know fermentation is proceeding correctly when you see a new cream-colored layer developing across the liquid’s surface, and the pH drops to 4.6 or lower after adding the culture. That aerobic environment, maintained by your breathable cover, is what allows the symbiotic bacteria and yeast to work their magic on the sweet tea base of 50 grams sucrose dissolved in a liter of steeped tea.
You’ve read the steps, examined the timeline, and understood the essentials, now it’s time to brew. With nothing more than tea, sugar, a SCOBY, and a clean jar, you can transform simple ingredients into a fizzy, probiotic-rich drink within 7 to 10 days. The process isn’t complicated once you’ve gathered your equipment. Sweet tea cools, fermentation begins, and patience does the rest.
Home kombucha brewing offers more than a finished beverage. It’s a hands-on introduction to fermentation culture, a craft that connects you to centuries of food preservation and flavor development. Whether you’re exploring this alongside cocktail experimentation or diving deeper into non-alcoholic beverage creation, kombucha represents the perfect intersection of health, flavor, and culinary curiosity.
Start your first batch this week. Monitor the temperature, check the pH, and taste as it develops. The satisfaction of pouring your own homemade kombucha, brewed exactly to your preference, makes the wait worthwhile. Welcome to fermentation.